In this post, we’ll walk you through the process of deploying a Node.js app to EdgeOrb and pointing a domain name to it (with SSL), from start to finish. We’ll be using a demo Node.Js application for this walkthrough, you can find that repository below.
https://github.com/edgeorb/demo-nodejs-app
If you already have a Dockerfile for your app, you can skip this section—great job!
A Dockerfile instructs Docker on how to package and start your app. Once we build the app using the Dockerfile, we’ll have a Docker image that can be deployed anywhere—including EdgeOrb.
We’ll walk through this process using the EdgeOrb Node.js demo app. Your app may be structured differently, which is fine. This guide should point you in the right direction, but you might need to consult other tutorials on setting up a Dockerfile for your specific app.
Our demo app could be a single .js file, but for this guide, we’ve split it into multiple files to better reflect a more complex application.
Our demo-app has the following structure:
In the root of your project, create a new empty file called ‘Dockerfile’ (with no extension). You can do this via the terminal with
touch Dockerfile
Now that you have a Dockerfile, we need to finally instruct Docker on how to build your app.
At the top of your Docker file, add this code. This tells Docker to base the docker image with an Alpine Operating System with NodeJS v20 installed.
FROM node:20-alpine
Next, we need to set the working directory within the container. You’re welcome to adjust the path to another folder if you prefer. Add this code:
WORKDIR /usr/src/app
Next, we need to install the external packages you’re using within the container so that your service can run. On the previous instruction, we set the working directory so this will actually copy package.json & package-lock.json (if present) to /usr/src/app within the container.
COPY package*.json ./

RUN npm install
Now that we’ve installed the apps package dependencies, we’ll need to copy across the rest of the files.
COPY . .
Now we just need to instruct Docker how to run your app, and which port will be exposed.
EXPOSE 8080

CMD ["node", "index.js"]
When we run the docker image, docker will execute node index.js on startup! To recap, we’ve instructed Docker to use Alpine NodeJS v20 as the base, installed the external node packages and copied all source code across. Here is a full snippet of the Dockerfile content.
FROM node:20-alpine

WORKDIR /usr/src/app

COPY package*.json ./

RUN npm install

COPY . .

EXPOSE 8080

CMD [ "node", "index.js" ]
Your app now has a Dockerfile, enabling us to build the app and create a docker image we can upload to EdgeOrb.
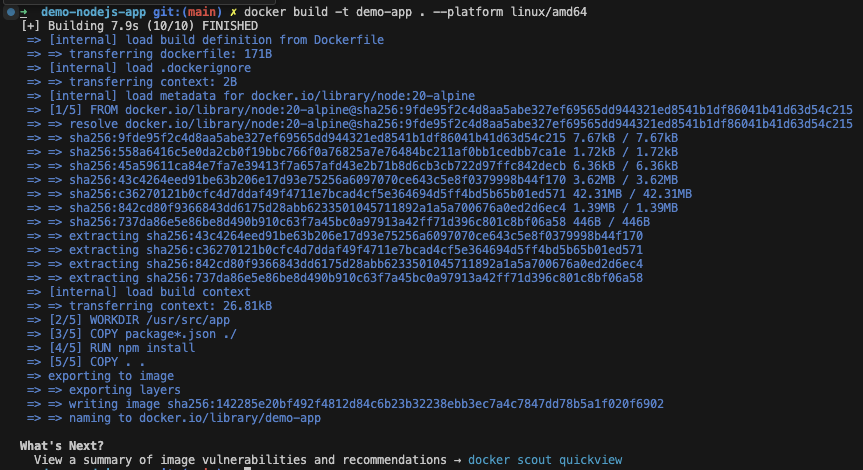
docker build -t demo-app . --platform linux/amd64
That’s it! You should see an output like this confirming that the image has been built.
If you execute the following command, this will start up the docker image we compiled above.
docker run -p 8080:8080 demo-app
Once running if you navigate to http://localhost:8080, you should see the expected result, Again, the result here will be different for your app as the demo-app runs on 8080.
If you already have an EdgeOrb Project setup, you can skip this.
Create an account by signing up for EdgeOrb @ https://app.edgeorb.com/signup
Once you have created an account, and have logged in you’ll be brought to the project summary page. Click on the new project button, and specify a name for your project. Think of something creative!
EdgeOrb needs a copy of the docker image that we just built, which means you’ll need to authenticate Docker with EdgeOrb registry servers.
In the EdgeOrb portal, click on your name in the bottom left corner and navigate to ‘Personal Access Tokens’ (PAT). Create a new token, and give it a name (it can be anything).
This will give you a token, with that token run the following command in your terminal. When it asks for the password, enter the password you just created.
docker login registry.edgeorb.com -u token'
Before you can create the service, we need to upload the docker image. Under the project, navigate to the Registry tab and click on the ‘Upload container image’ tab.
This will give you a unique registry for your project. Follow the instructions on the ‘How to upload your container image’ modal.

In the EdgeOrb portal, under the project you just created click on Create service.
For the purposes of this demo, fill out the create service form and select Dynamic for the service type. Add in the port that your service is listening on, and add any environment variables that you might need.
Here is an example of what it would look like for the demo app.
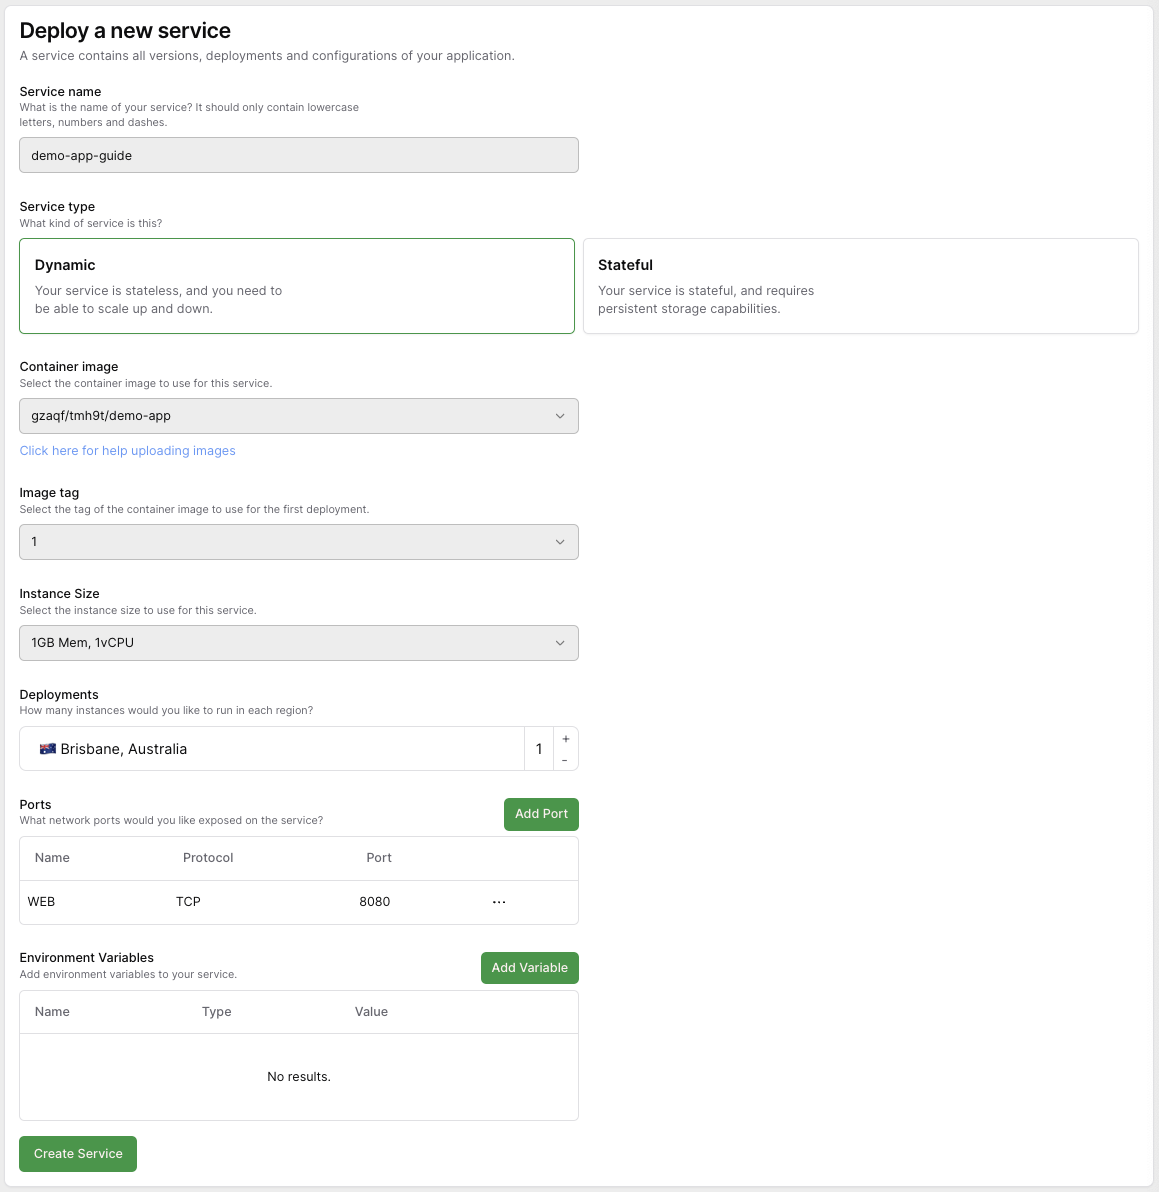
Now we’re ready to launch! Click on ‘Create Service’, and hold tight.
After a minute, the service will have started and we should see there is an instance in a ‘Running’ status.
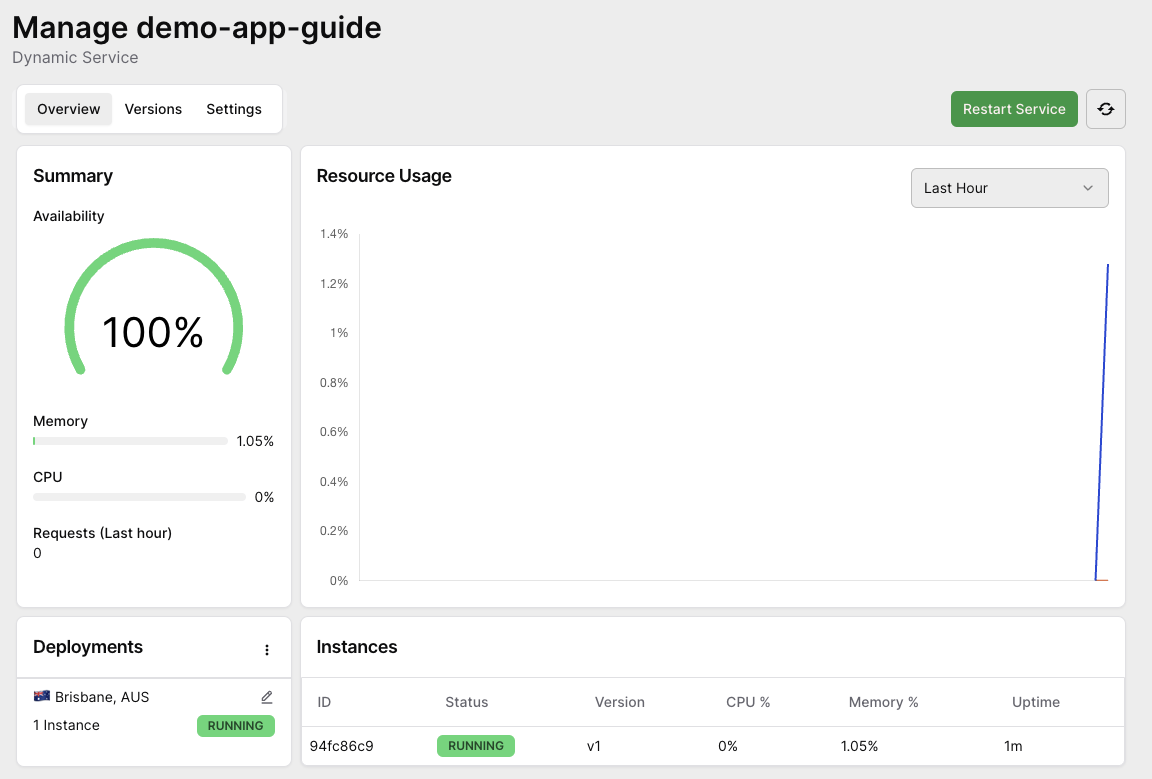
Congratulations, your service is now online!
Our service is now running, but we need to expose it to the internet.
Navigate to the endpoints tab, and create a new endpoint. For the endpoint type, select Web Application (L7) and for the purposes of this demo we’ll use an EdgeOrb domain. If you have a domain, you can select custom domain and verifying that.
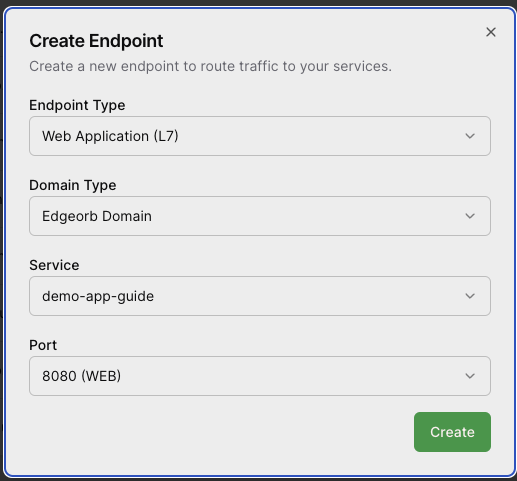
Once created, you should see a new endpoint with a unique URL against it. That URL will route to our service.
Here is the URL for the service we deployed for this guide, give it a go!